
Instructions
How to assemble your planter
Combining cedar and plastic has never been this much fun. No tools, no glue — four panels, four corners and a drain plate slide together in about two minutes.
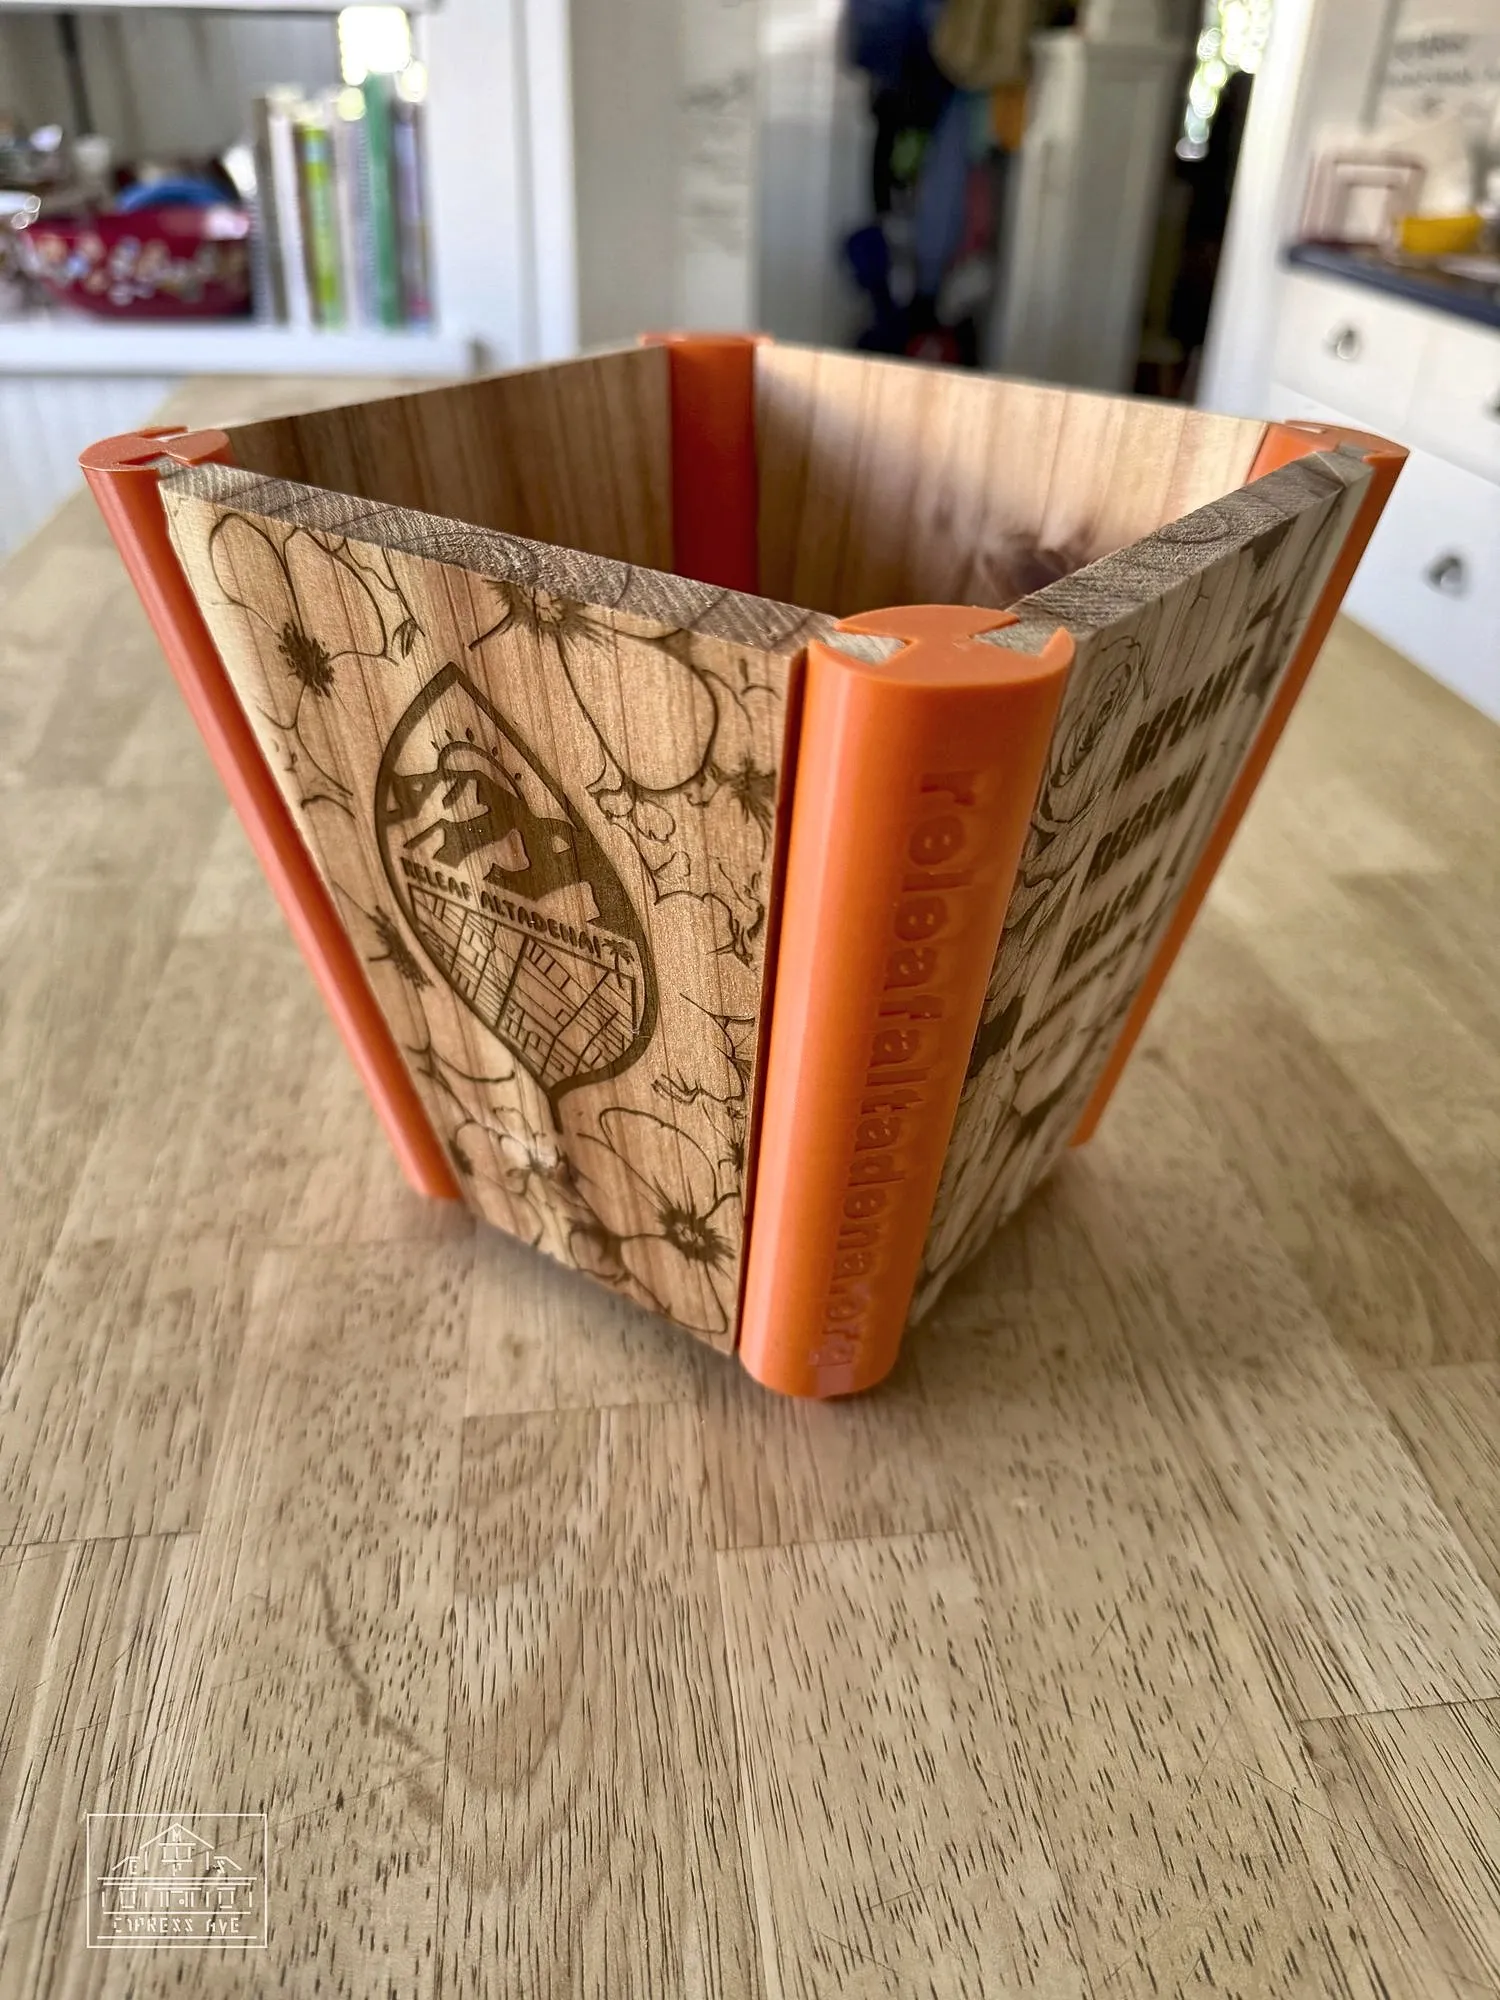
Interactive 3D guide
Assembling your planter
Drag the slider to step through the build, or press Play. Drag on the model to spin it, scroll to zoom. Pick a filament color to see how your corners will look.
Needs WebGL (any modern browser). Open the guide full-screen ↗
Step by step
The photo version
The one rule: panels only ever go into a corner post from the top. Everything else follows from that.
-
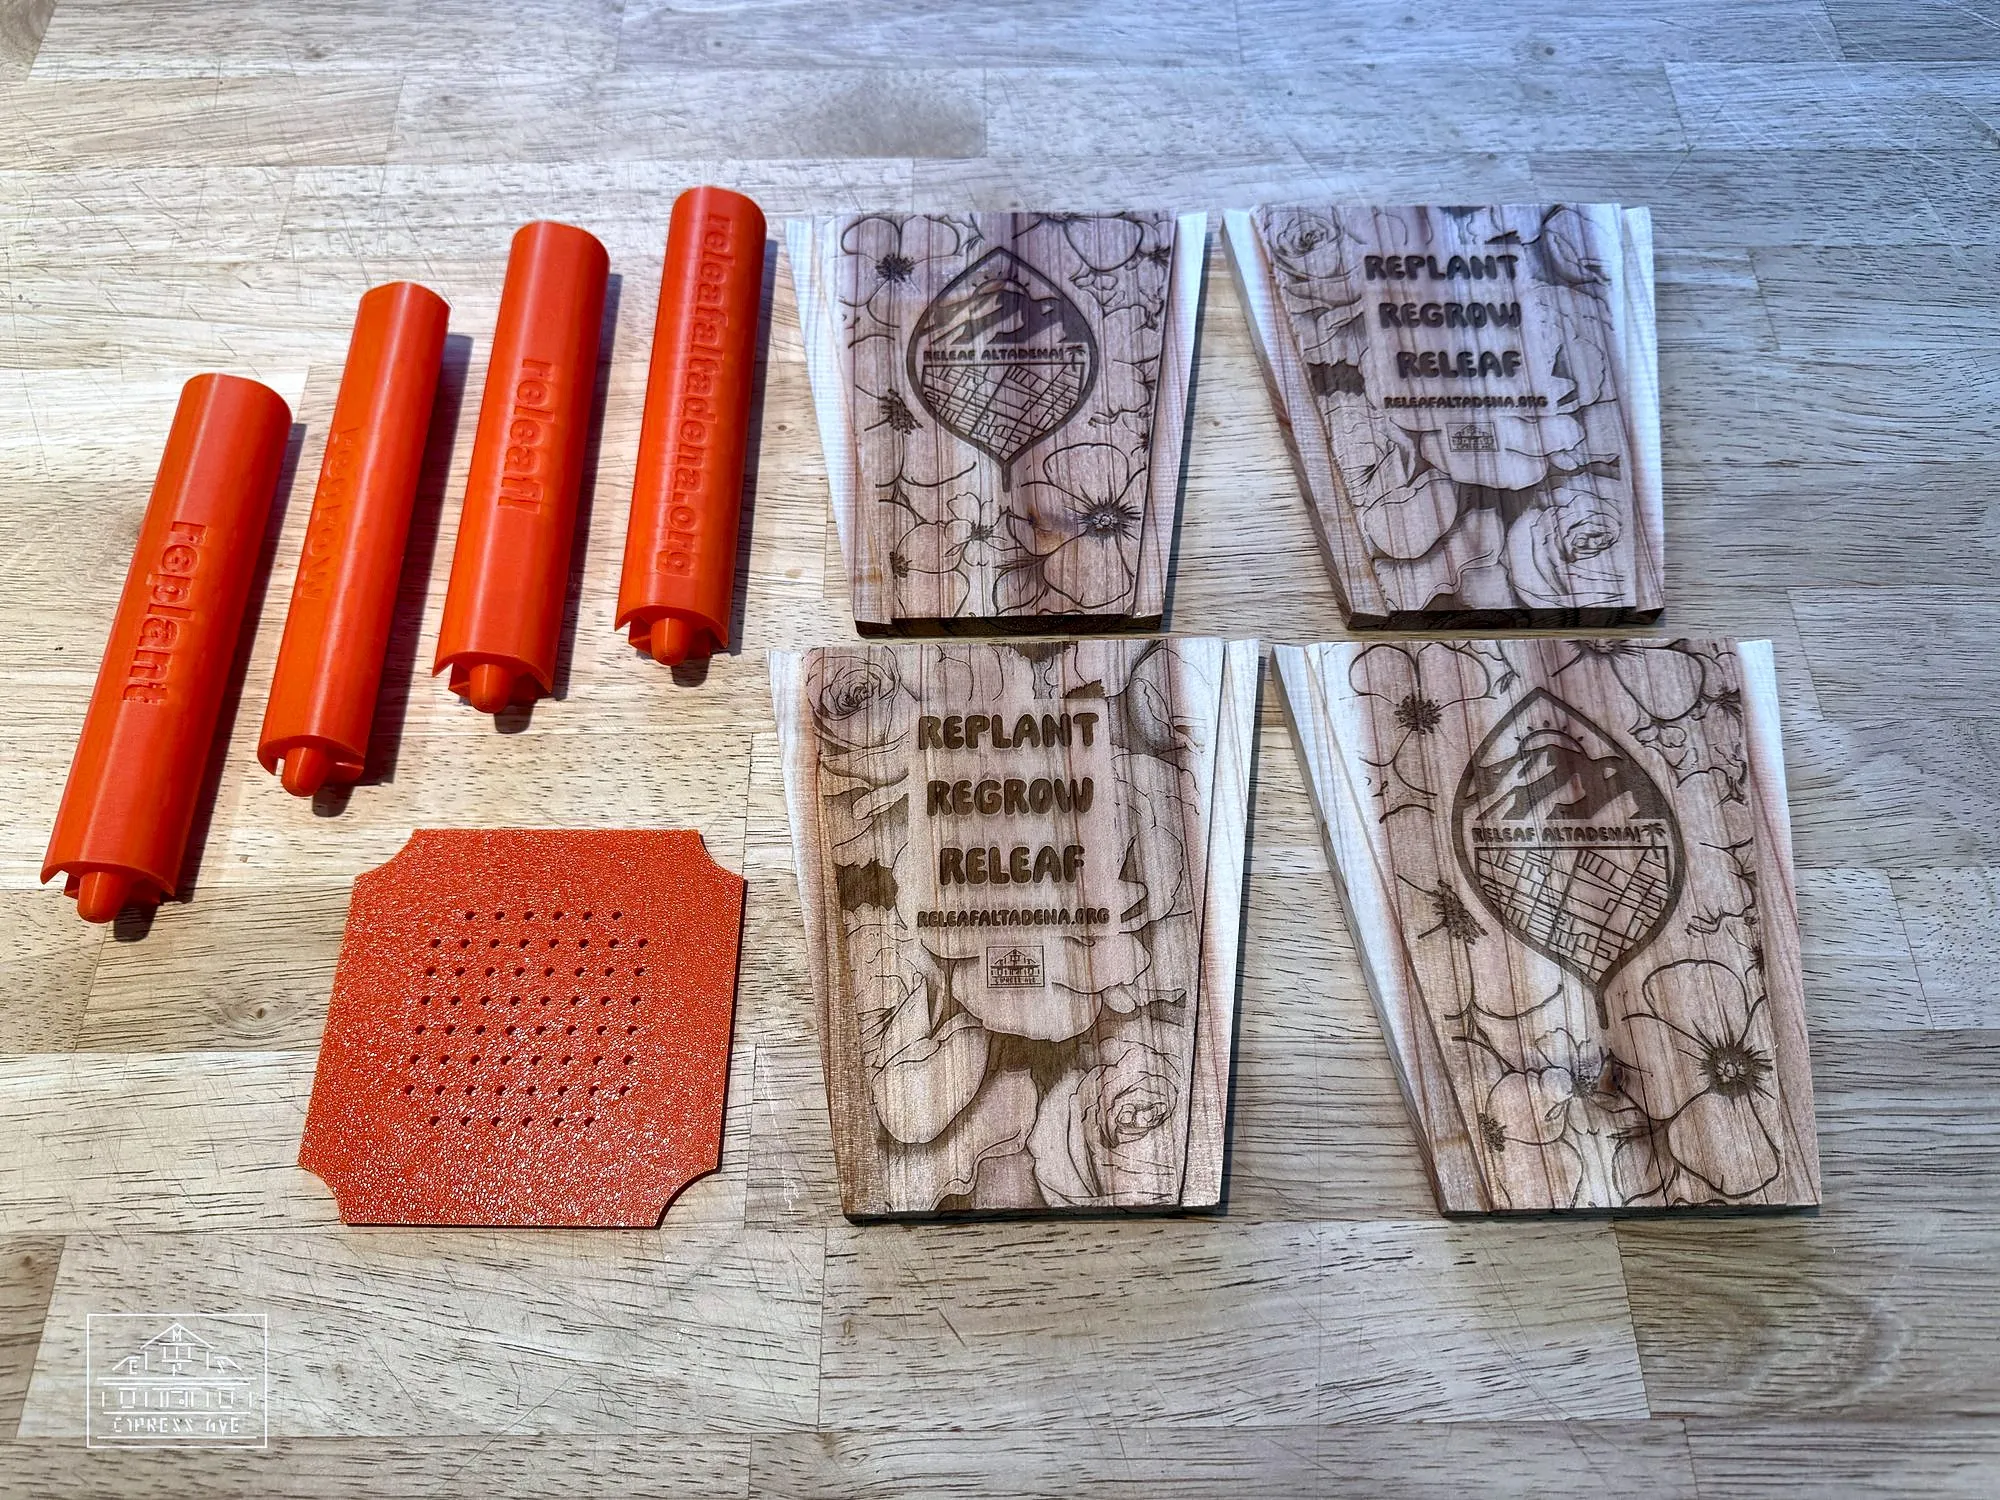 01
Lay out the parts
You should have four cedar side panels, four printed corner posts and one perforated drain plate. Check that the engraved faces of the panels are all facing the same way (outward).
-
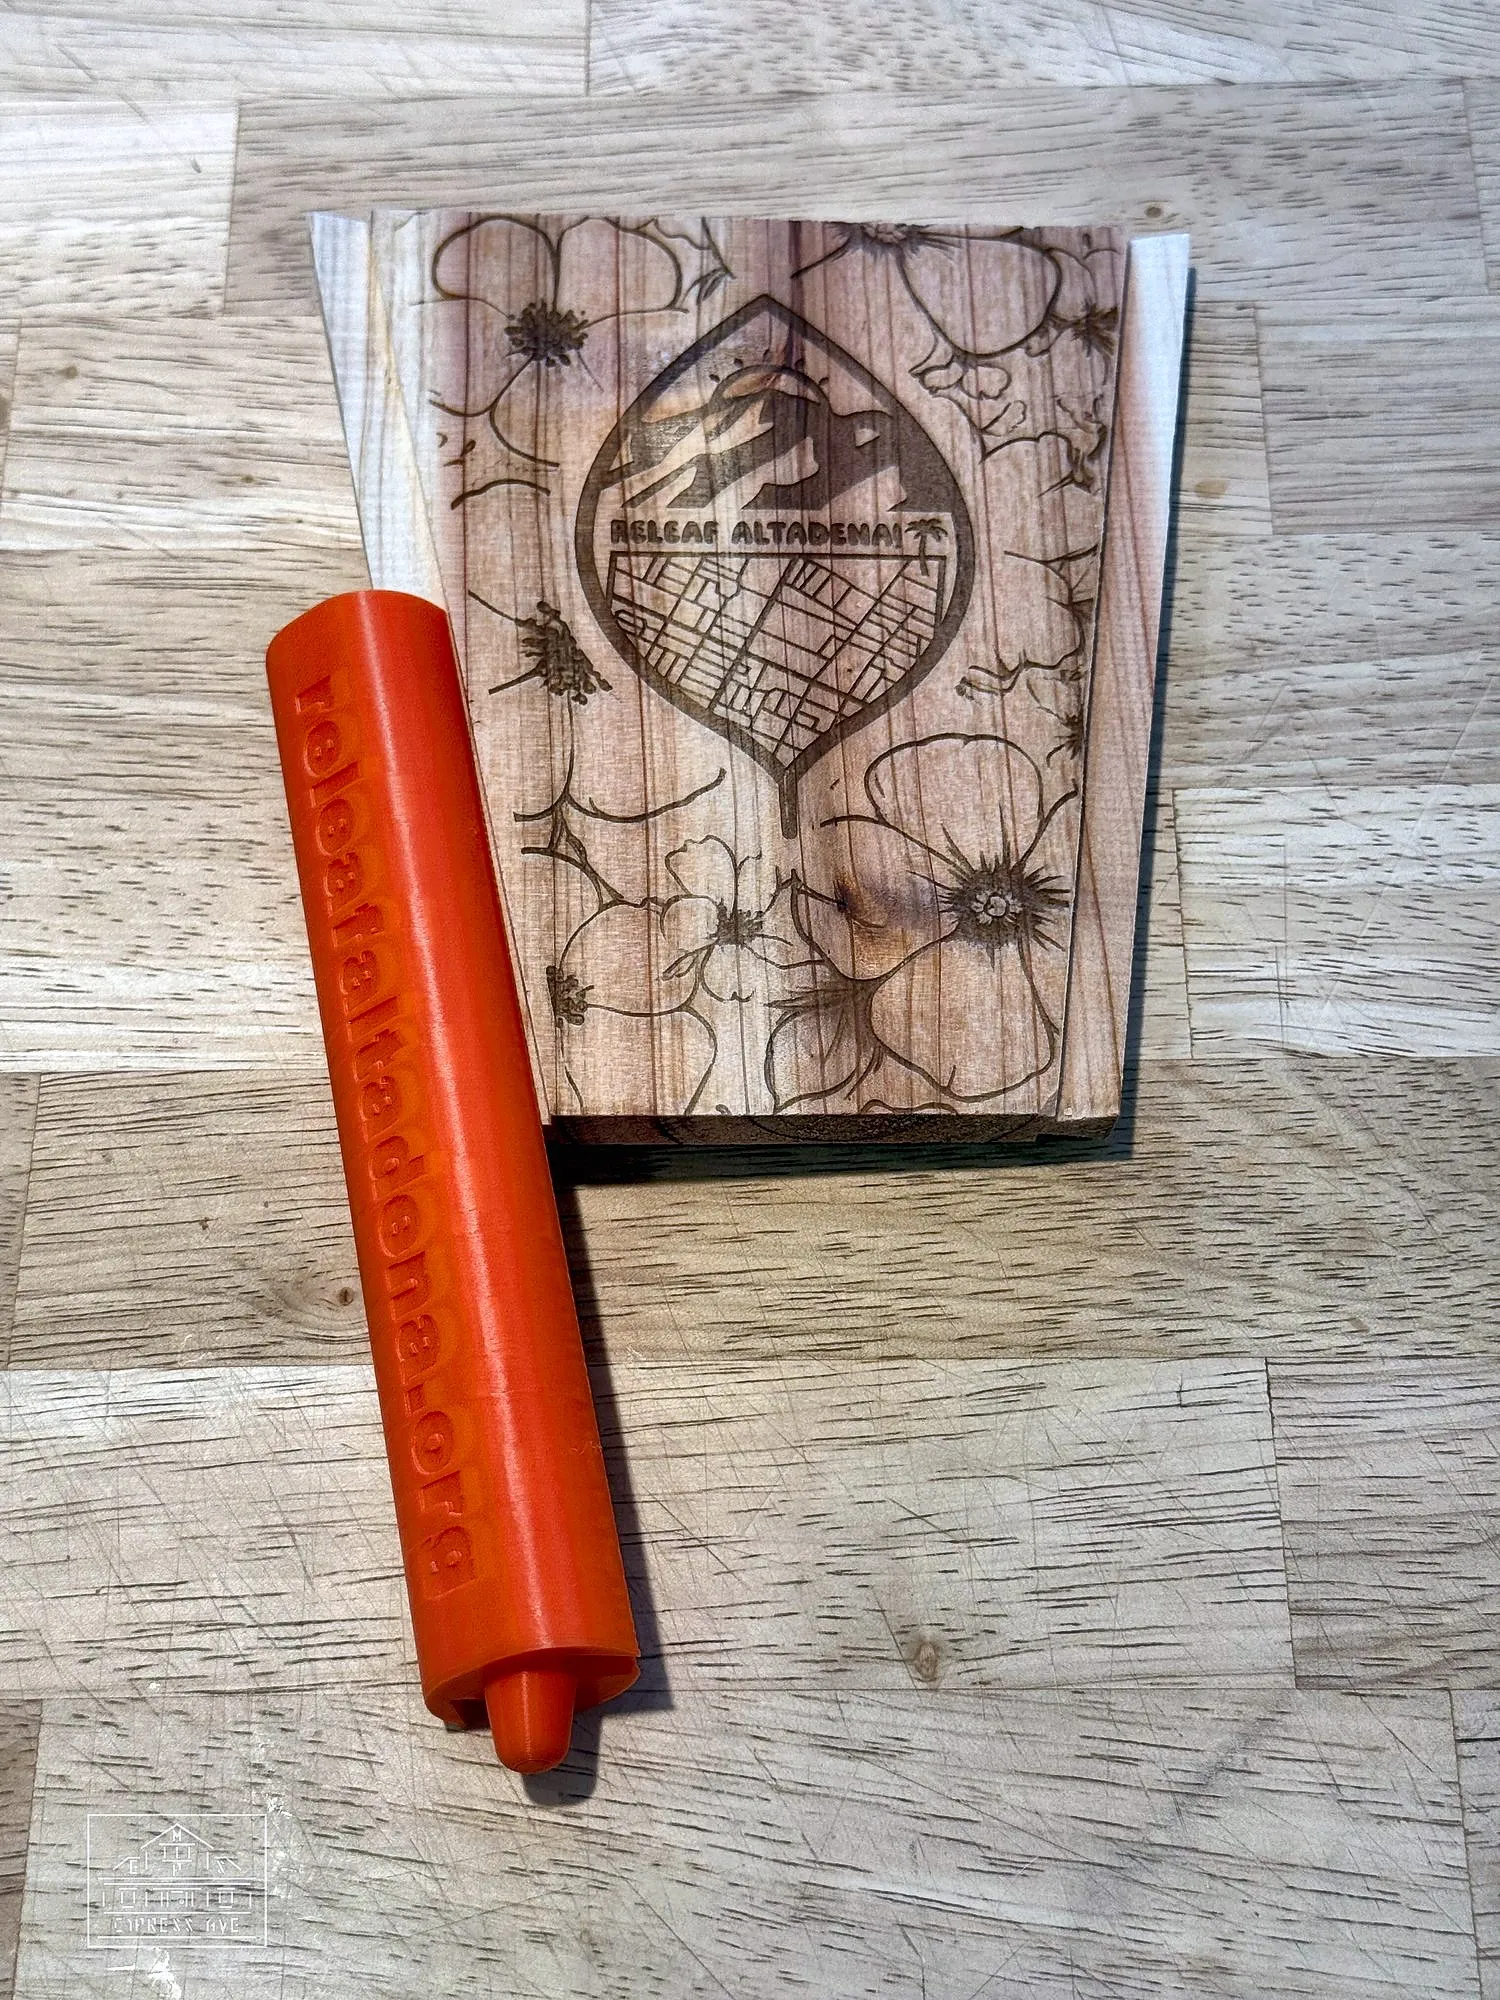 02
Find the groove
Each corner post has two slots running down its length. Every slot is closed at the bottom by a small stop, so a panel can only go in from the top — that's what keeps the box from sliding apart.
-
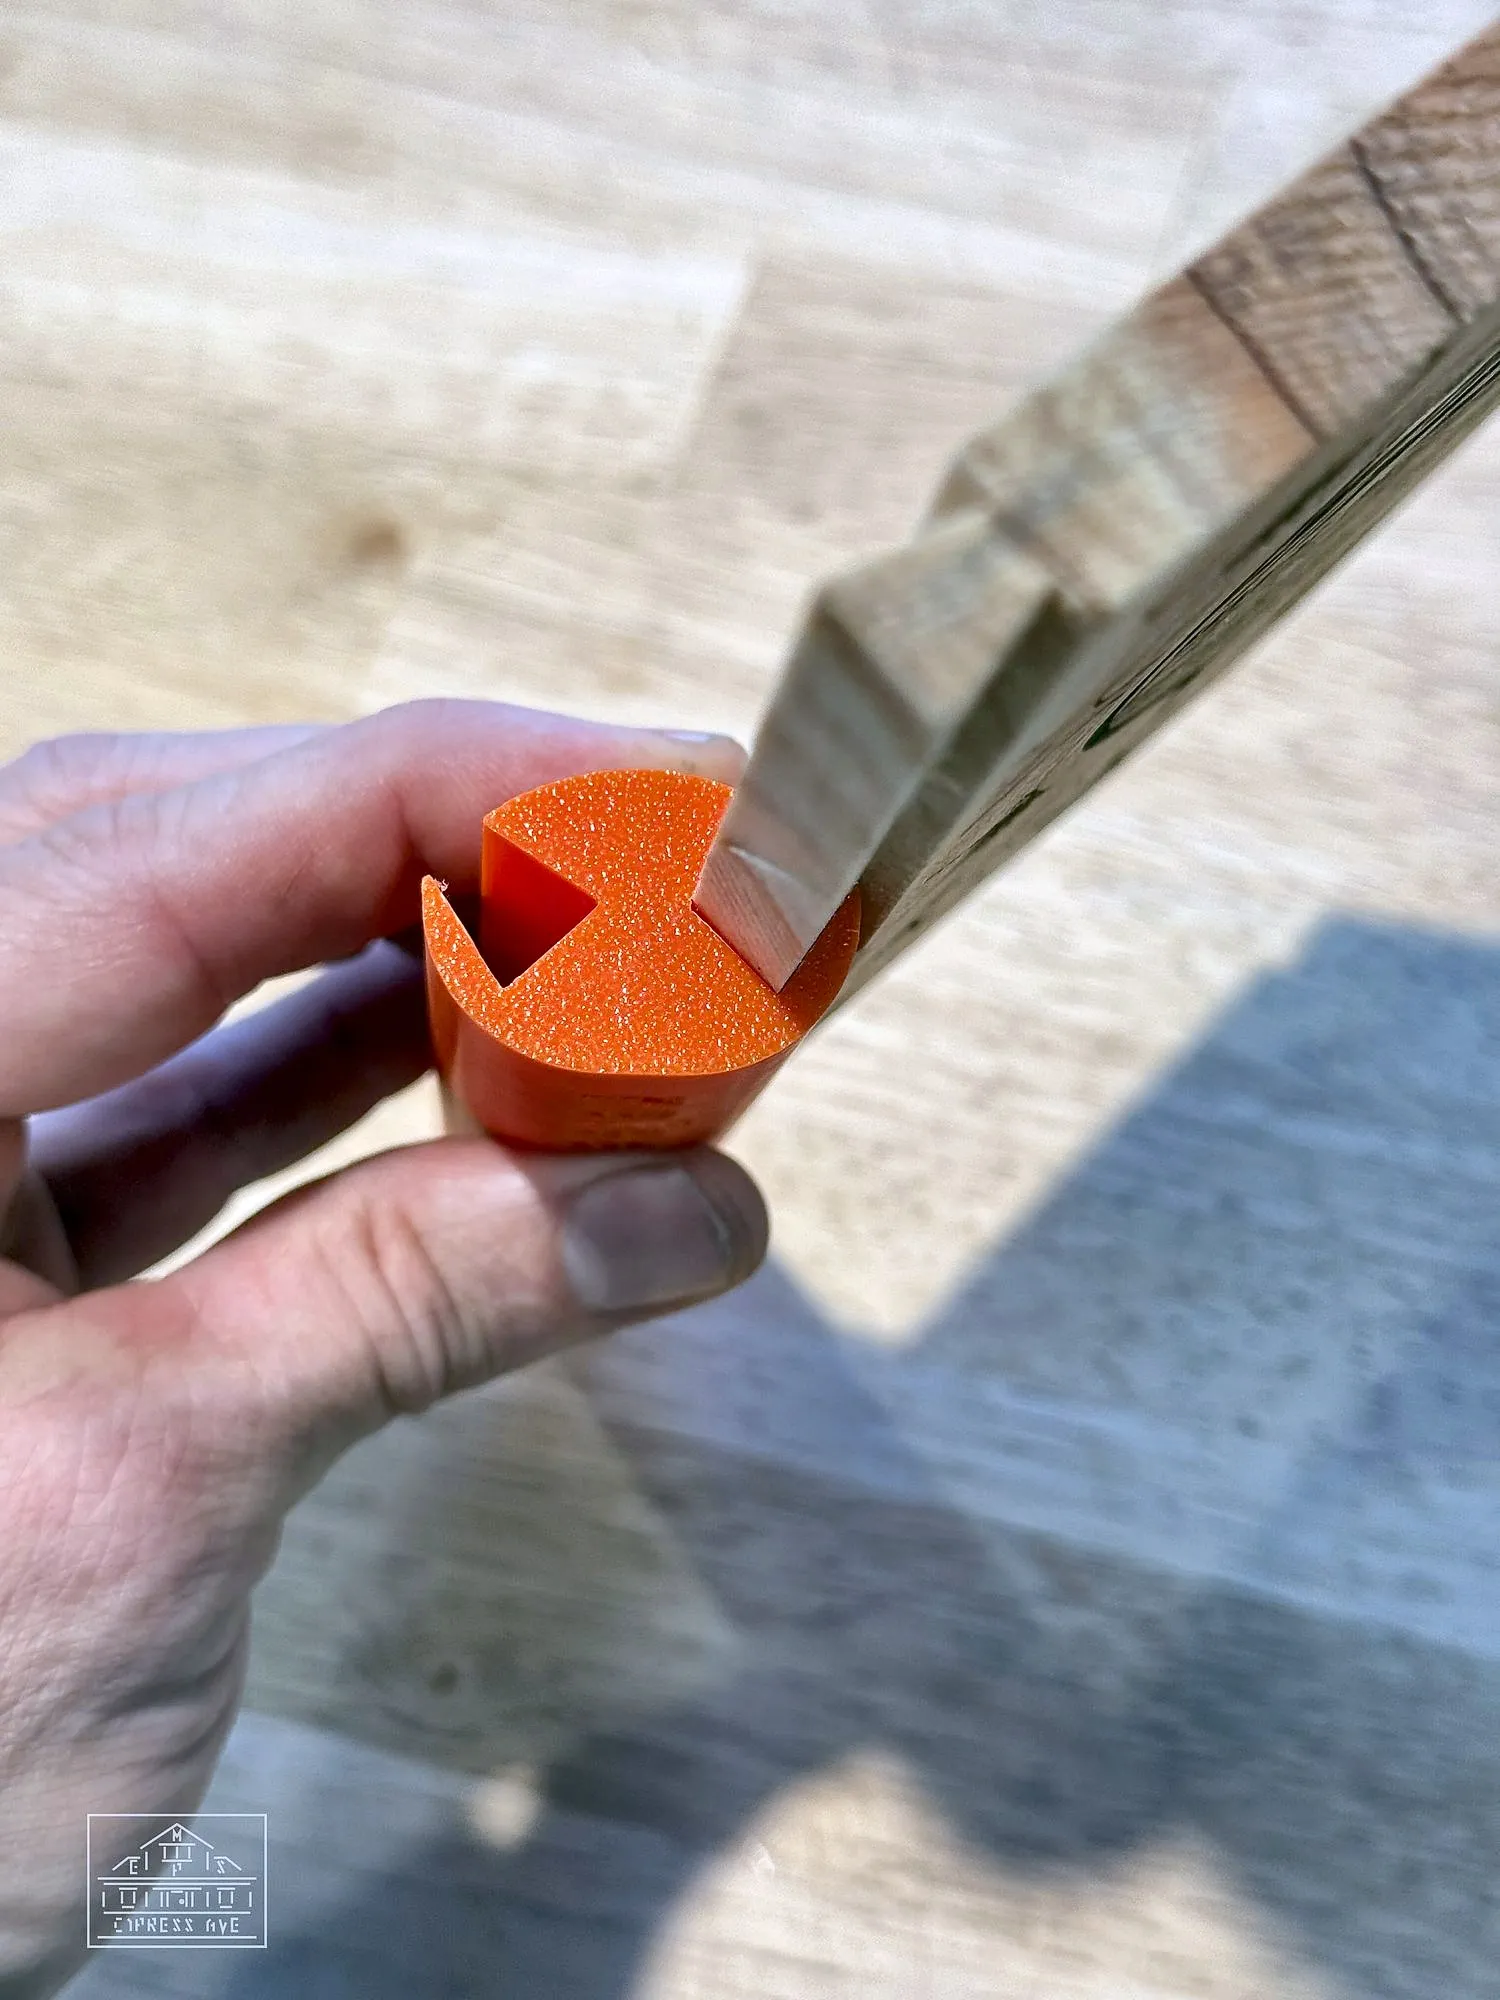 03
Slide in the first panel
Hold a corner post upright and slide a panel's edge down into one slot from the top until it seats on the stop. Snug is right; don't force it.
-
 04
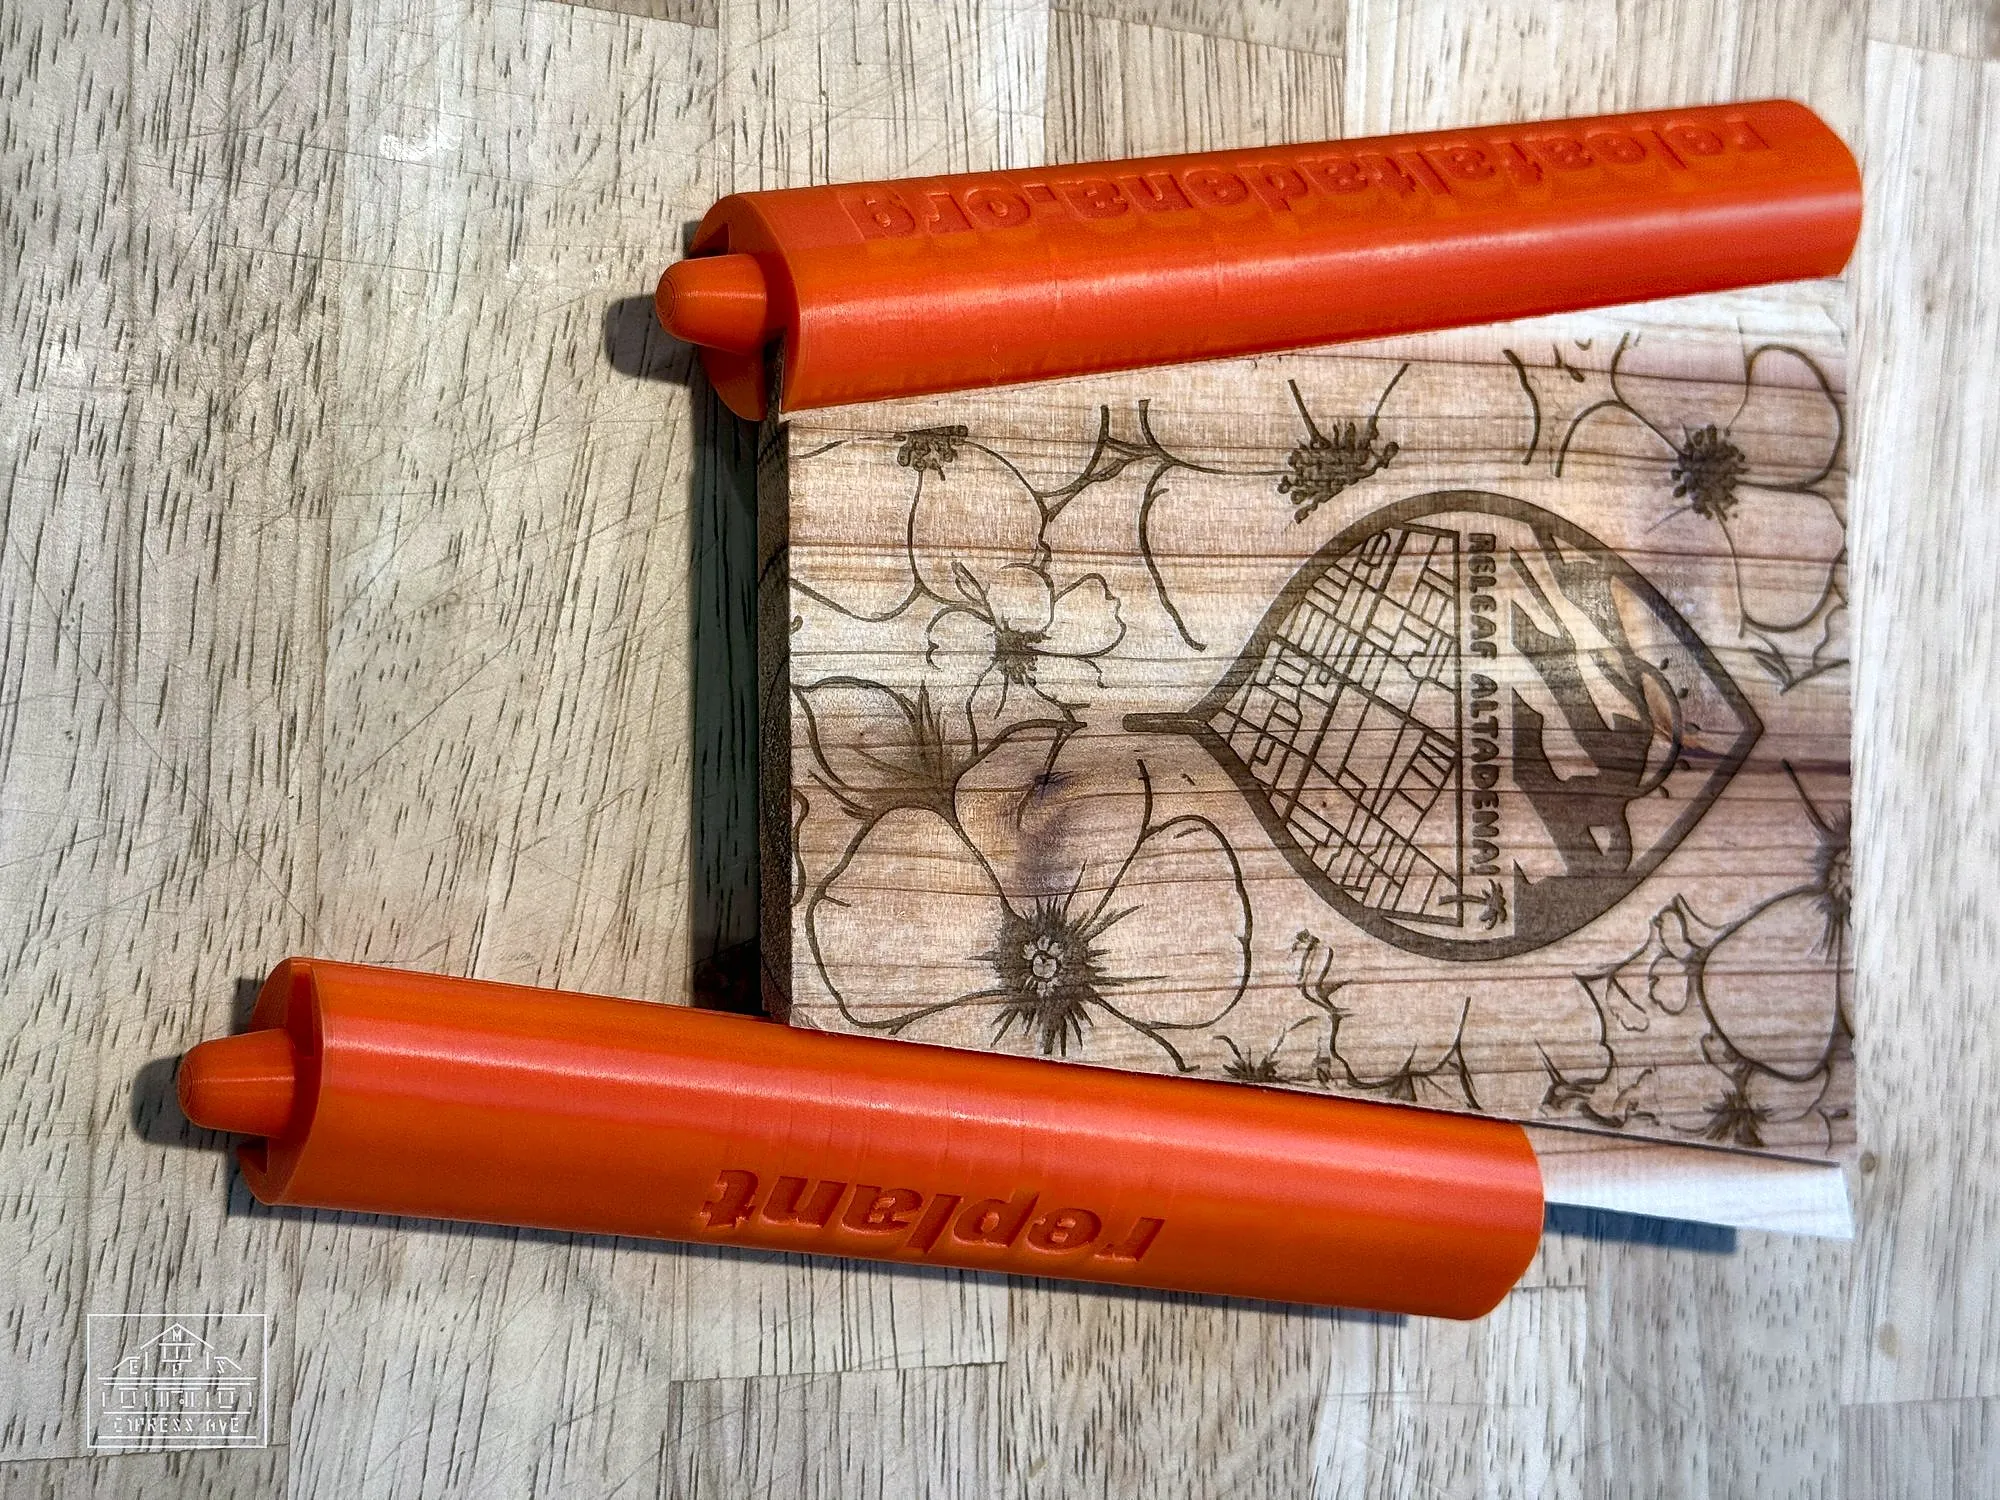
Add the second post
Slide a second post onto the panel's other edge. You now have a flat panel with a post on each side.
-
 05
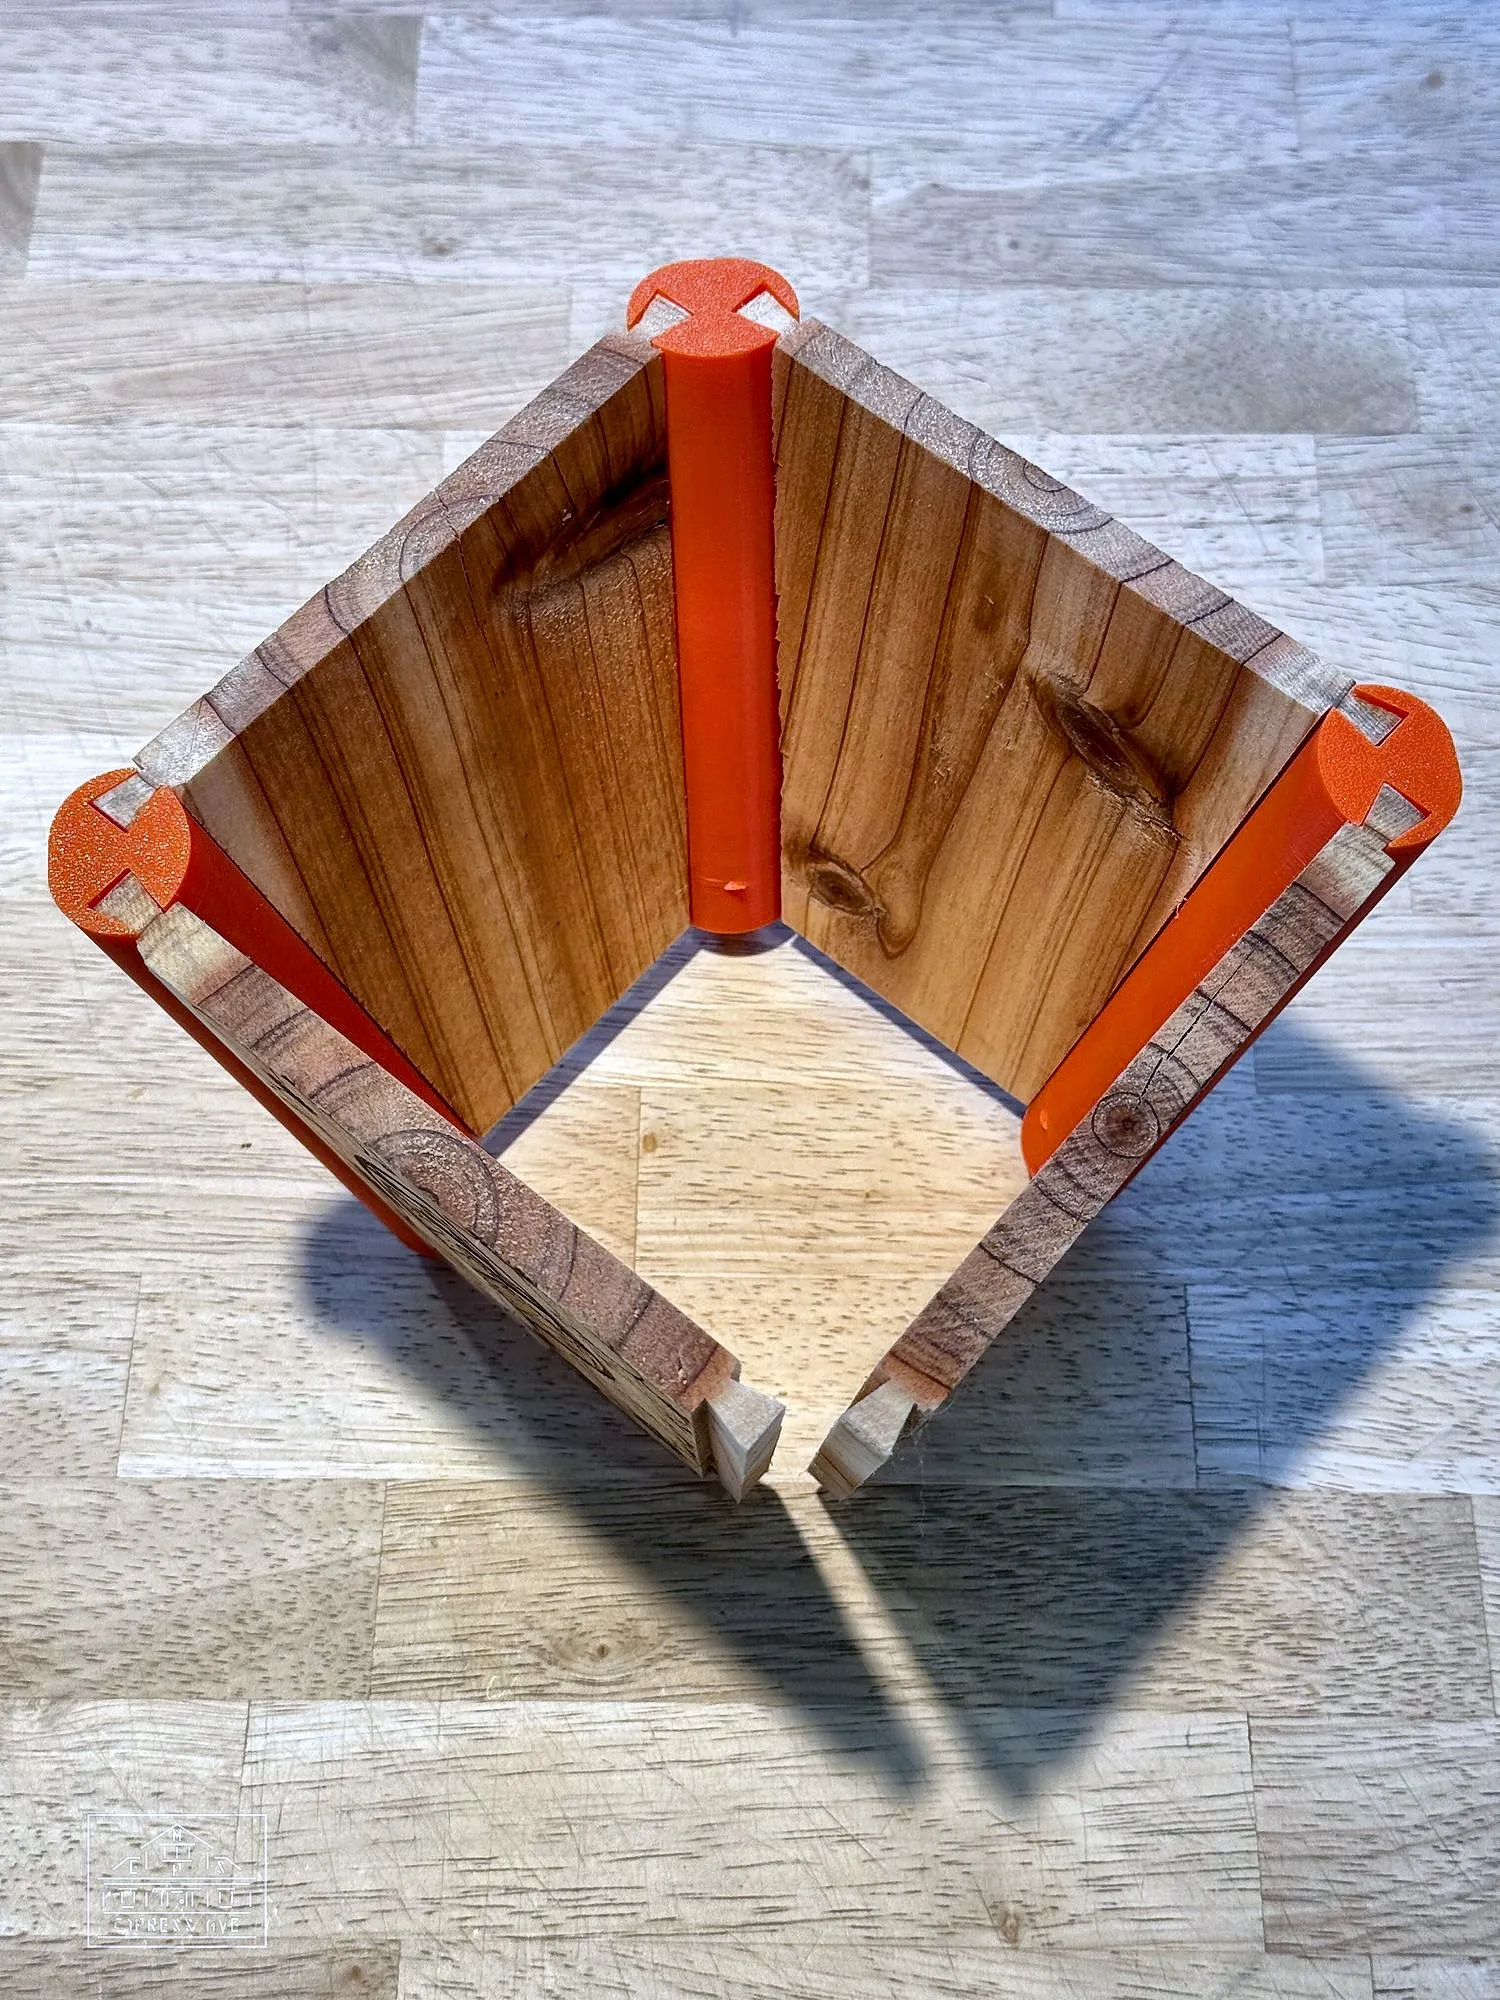
Build the second wall
Add the next panel to one of the open slots, then its post, working around the box. Keep the engraved side out.
-
 06
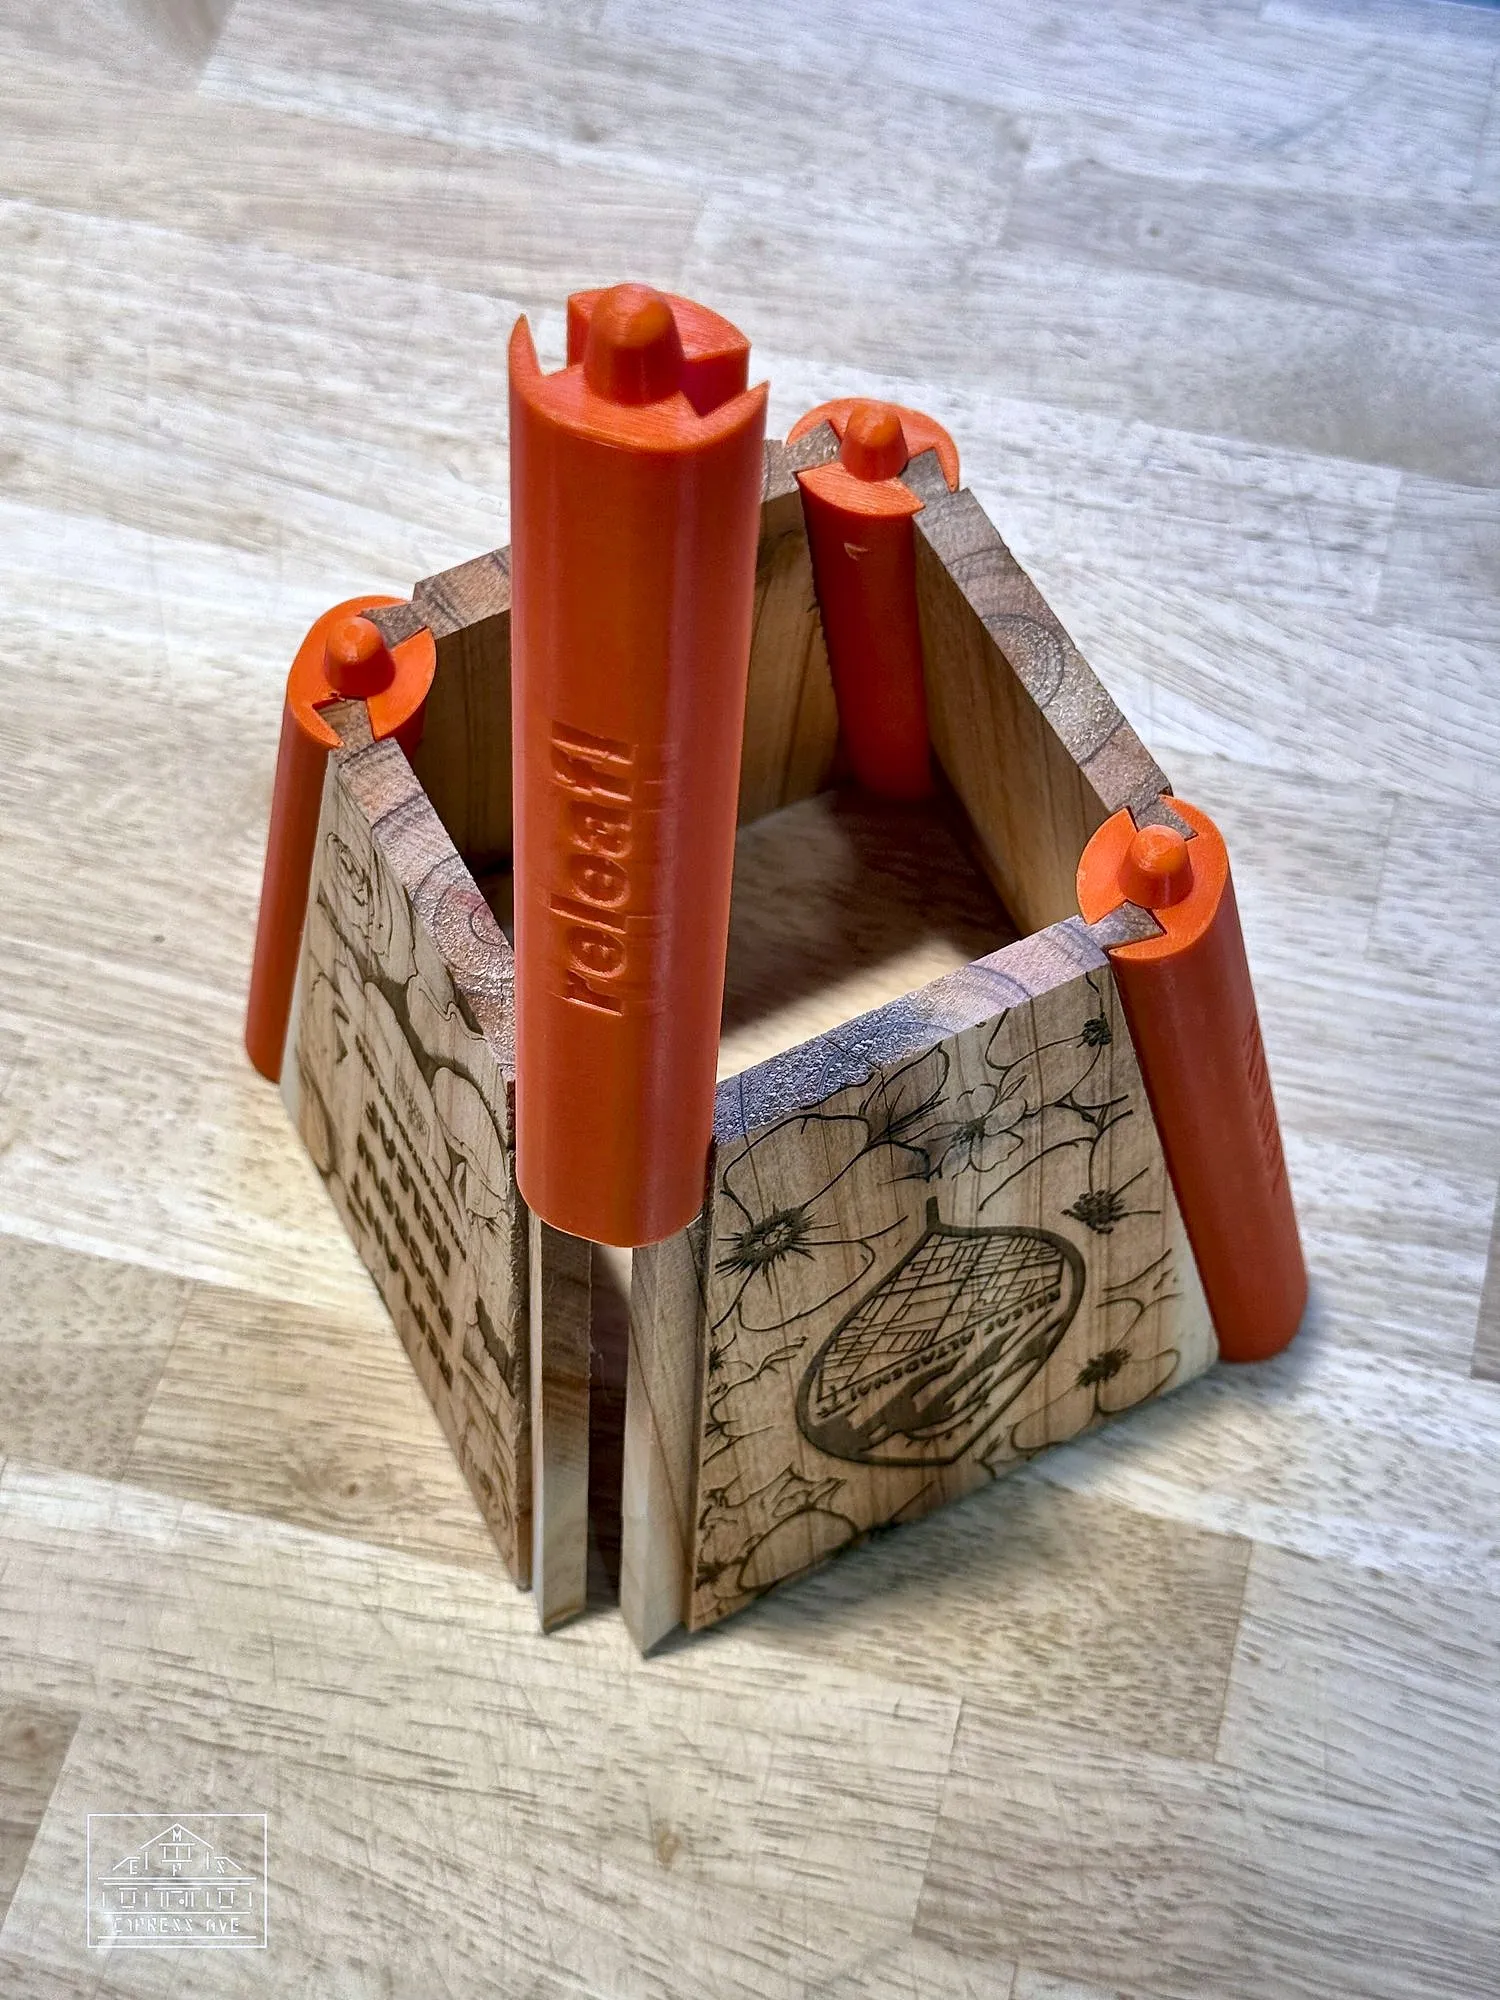
Three sides up
With three panels and four posts in place the box will stand on its own. Everything should feel loose-but-square at this stage.
-
 07
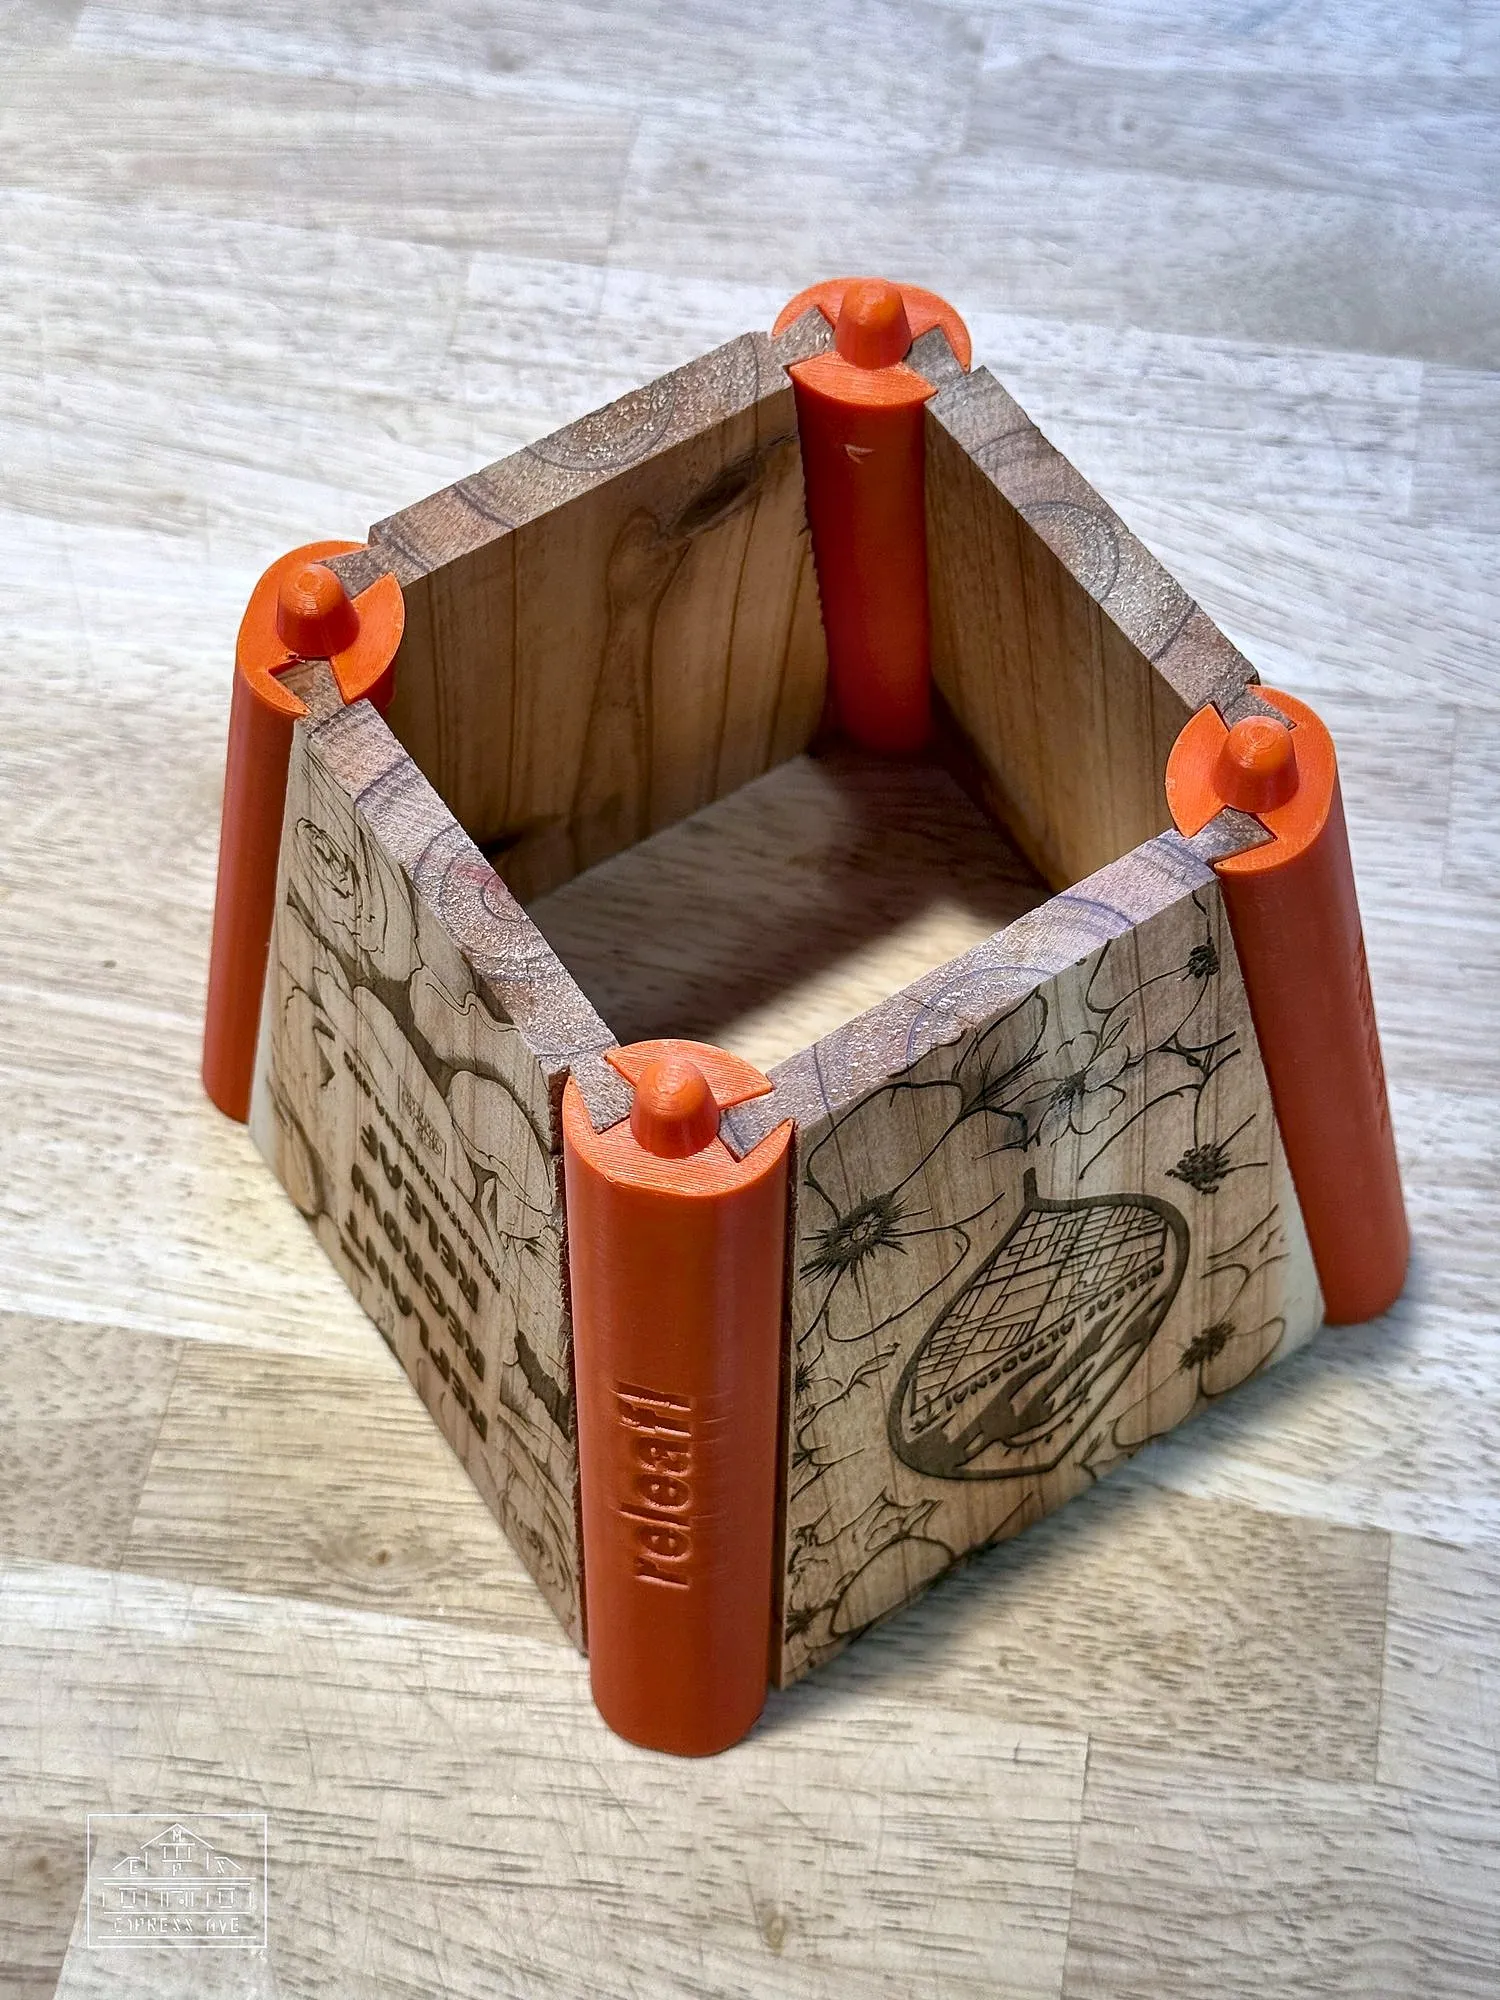
Close the box
Drop the last panel into the two remaining slots from the top. Push each post down gently so all four panels sit on their stops.
-
 08
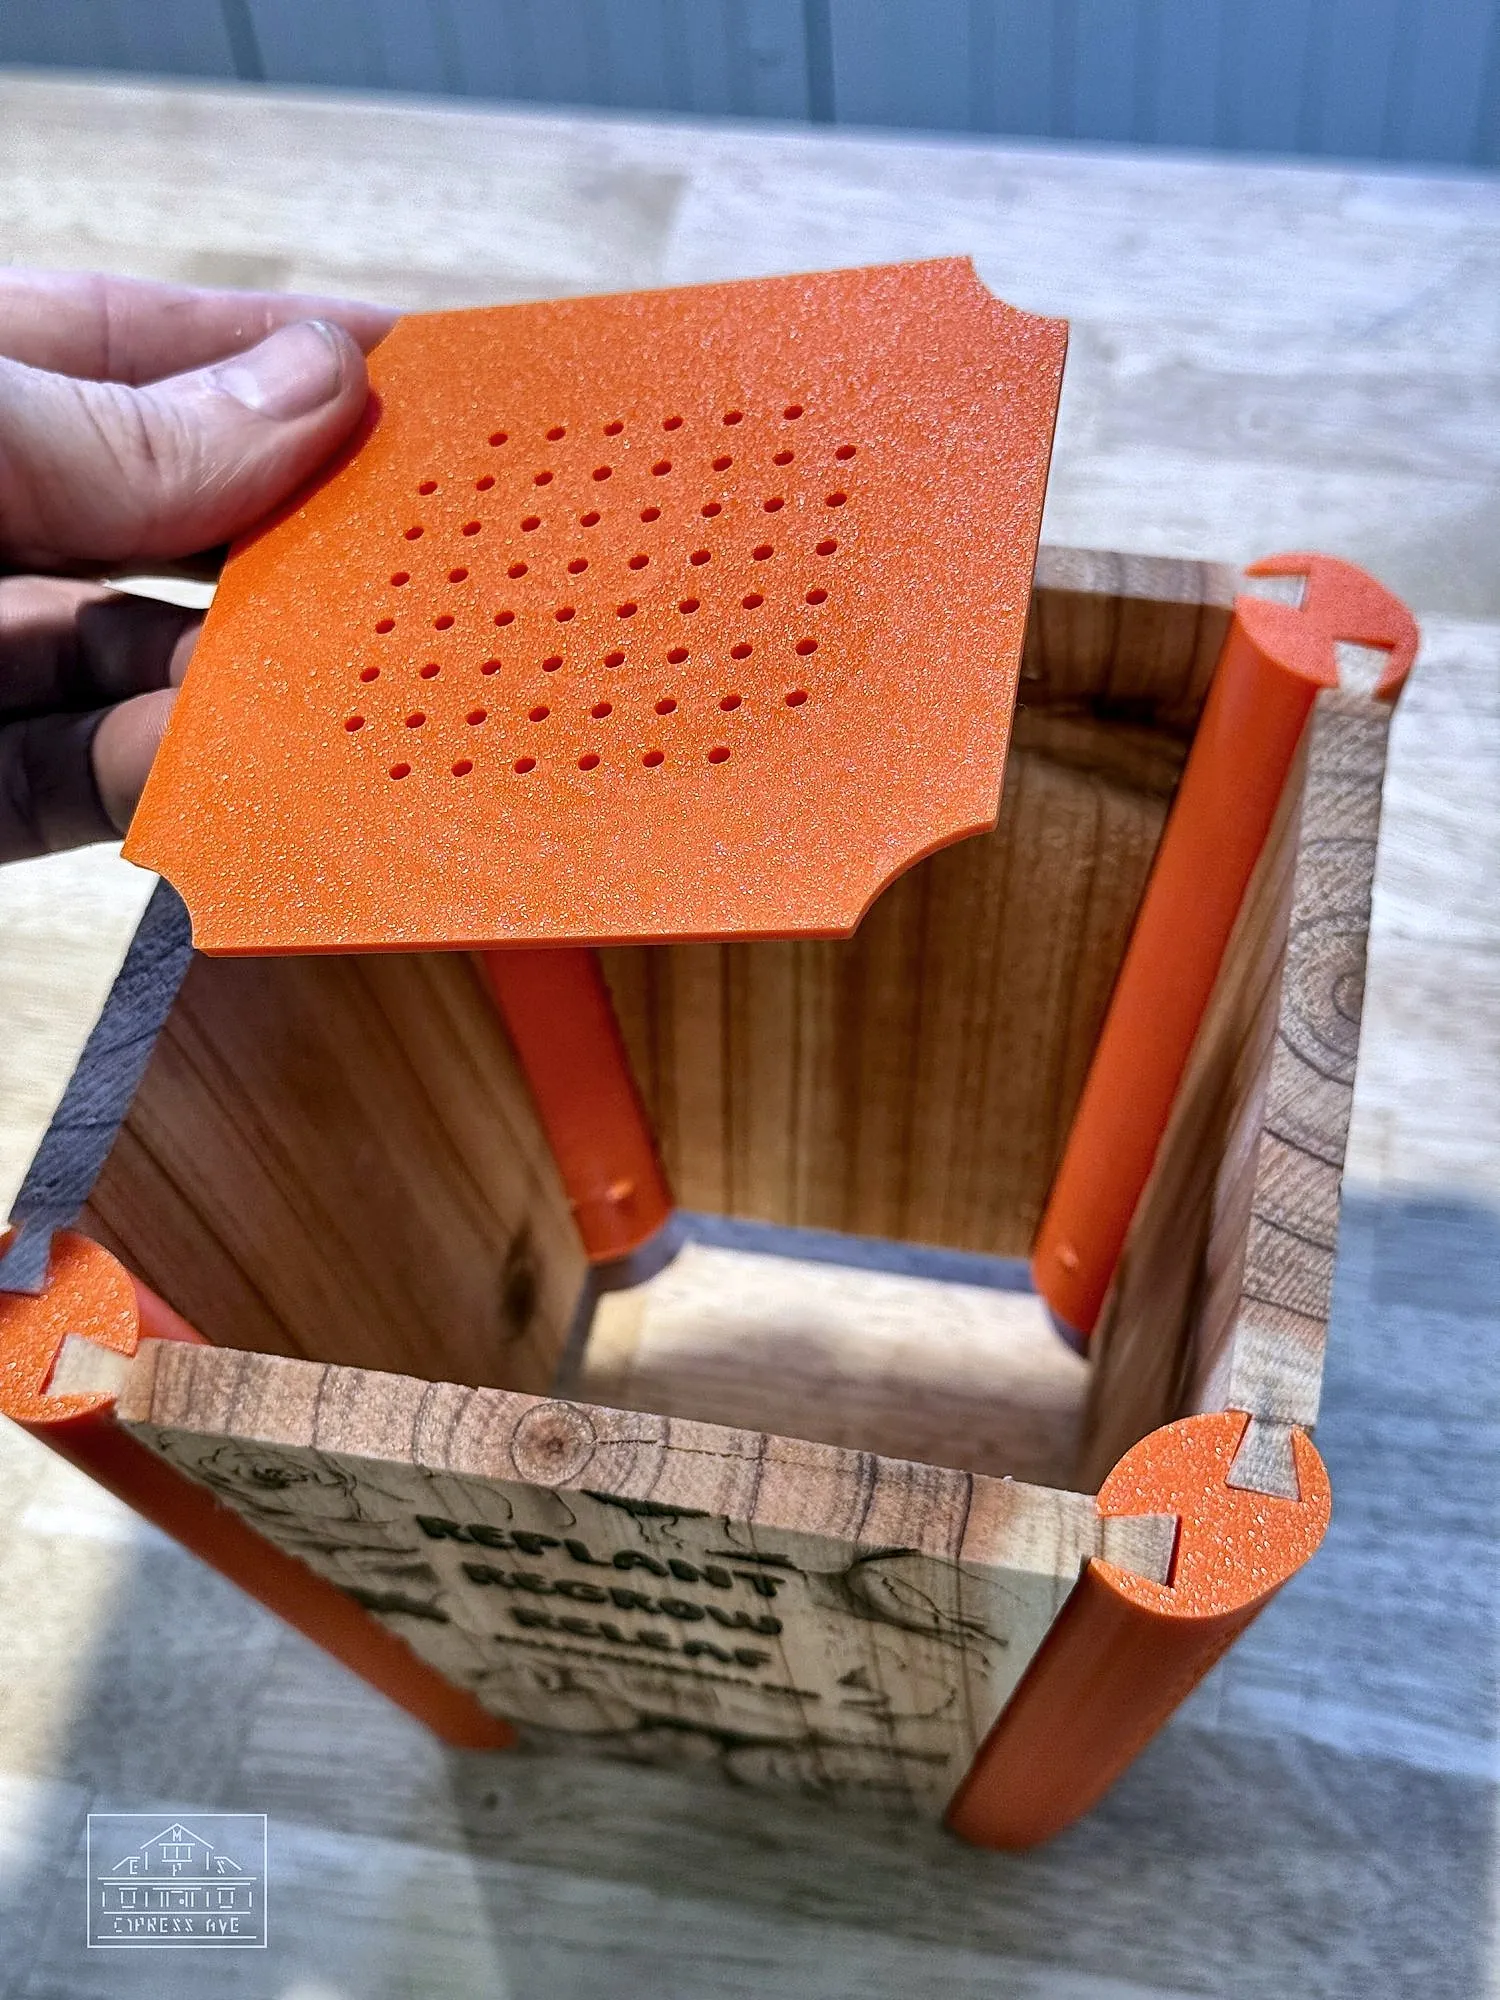
Drain plate
The orange drain plate goes in from the top, holes down. Its notched corners clear the posts.
-
 09
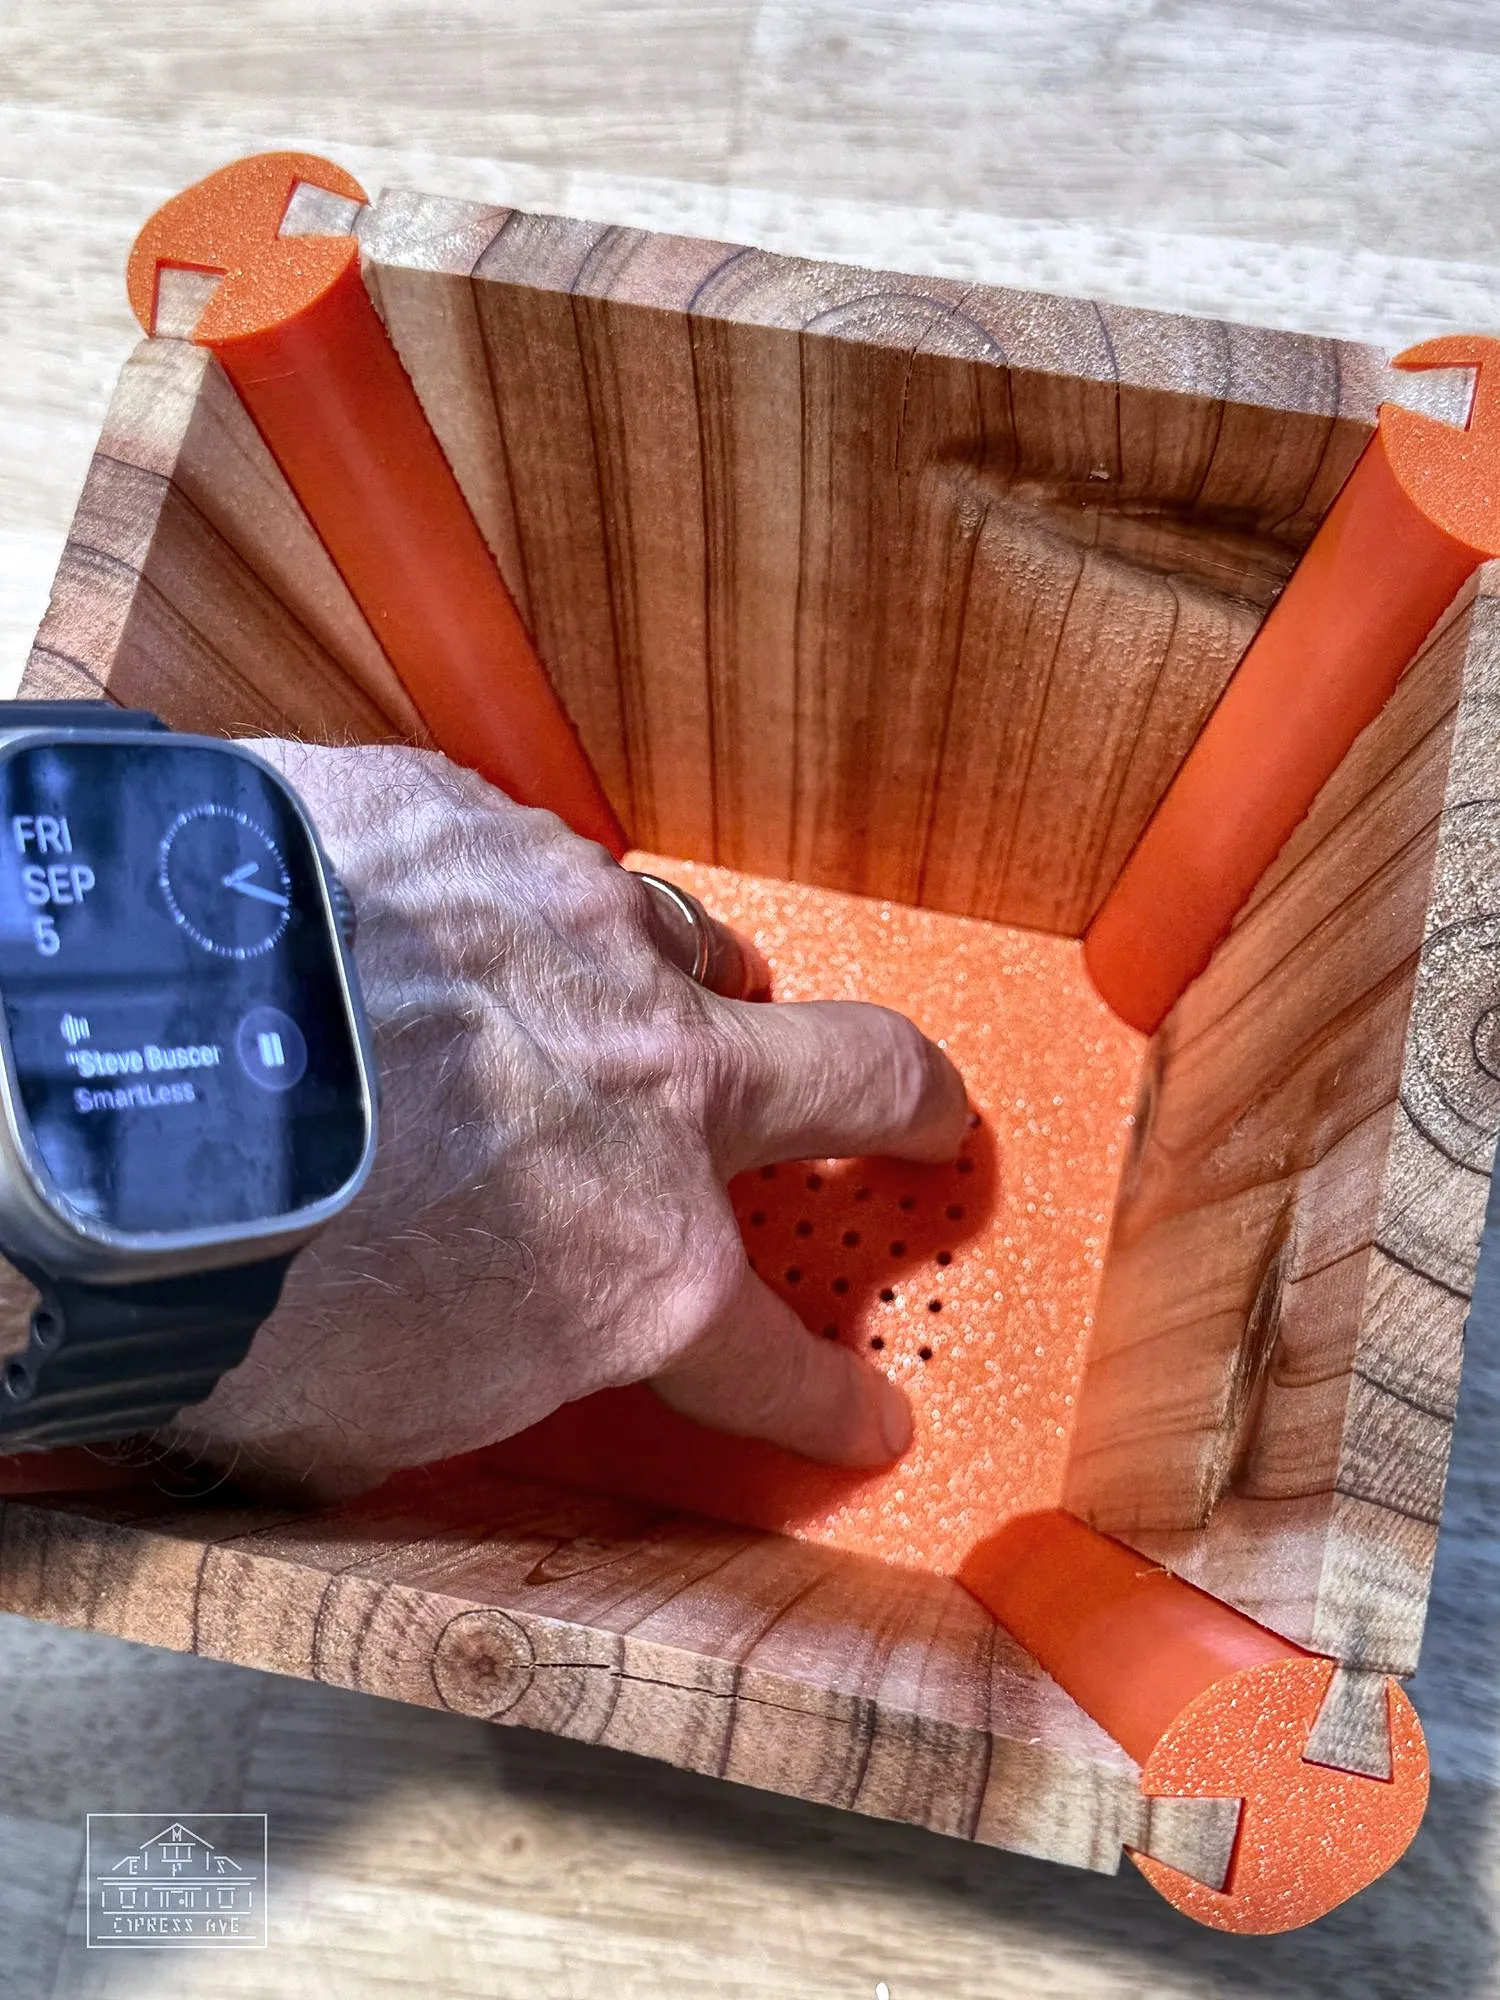
Press it home
Push the plate down to the ledge inside the corners. It should sit level, just above the bottom of the panels, so water can drain through.
-
 10
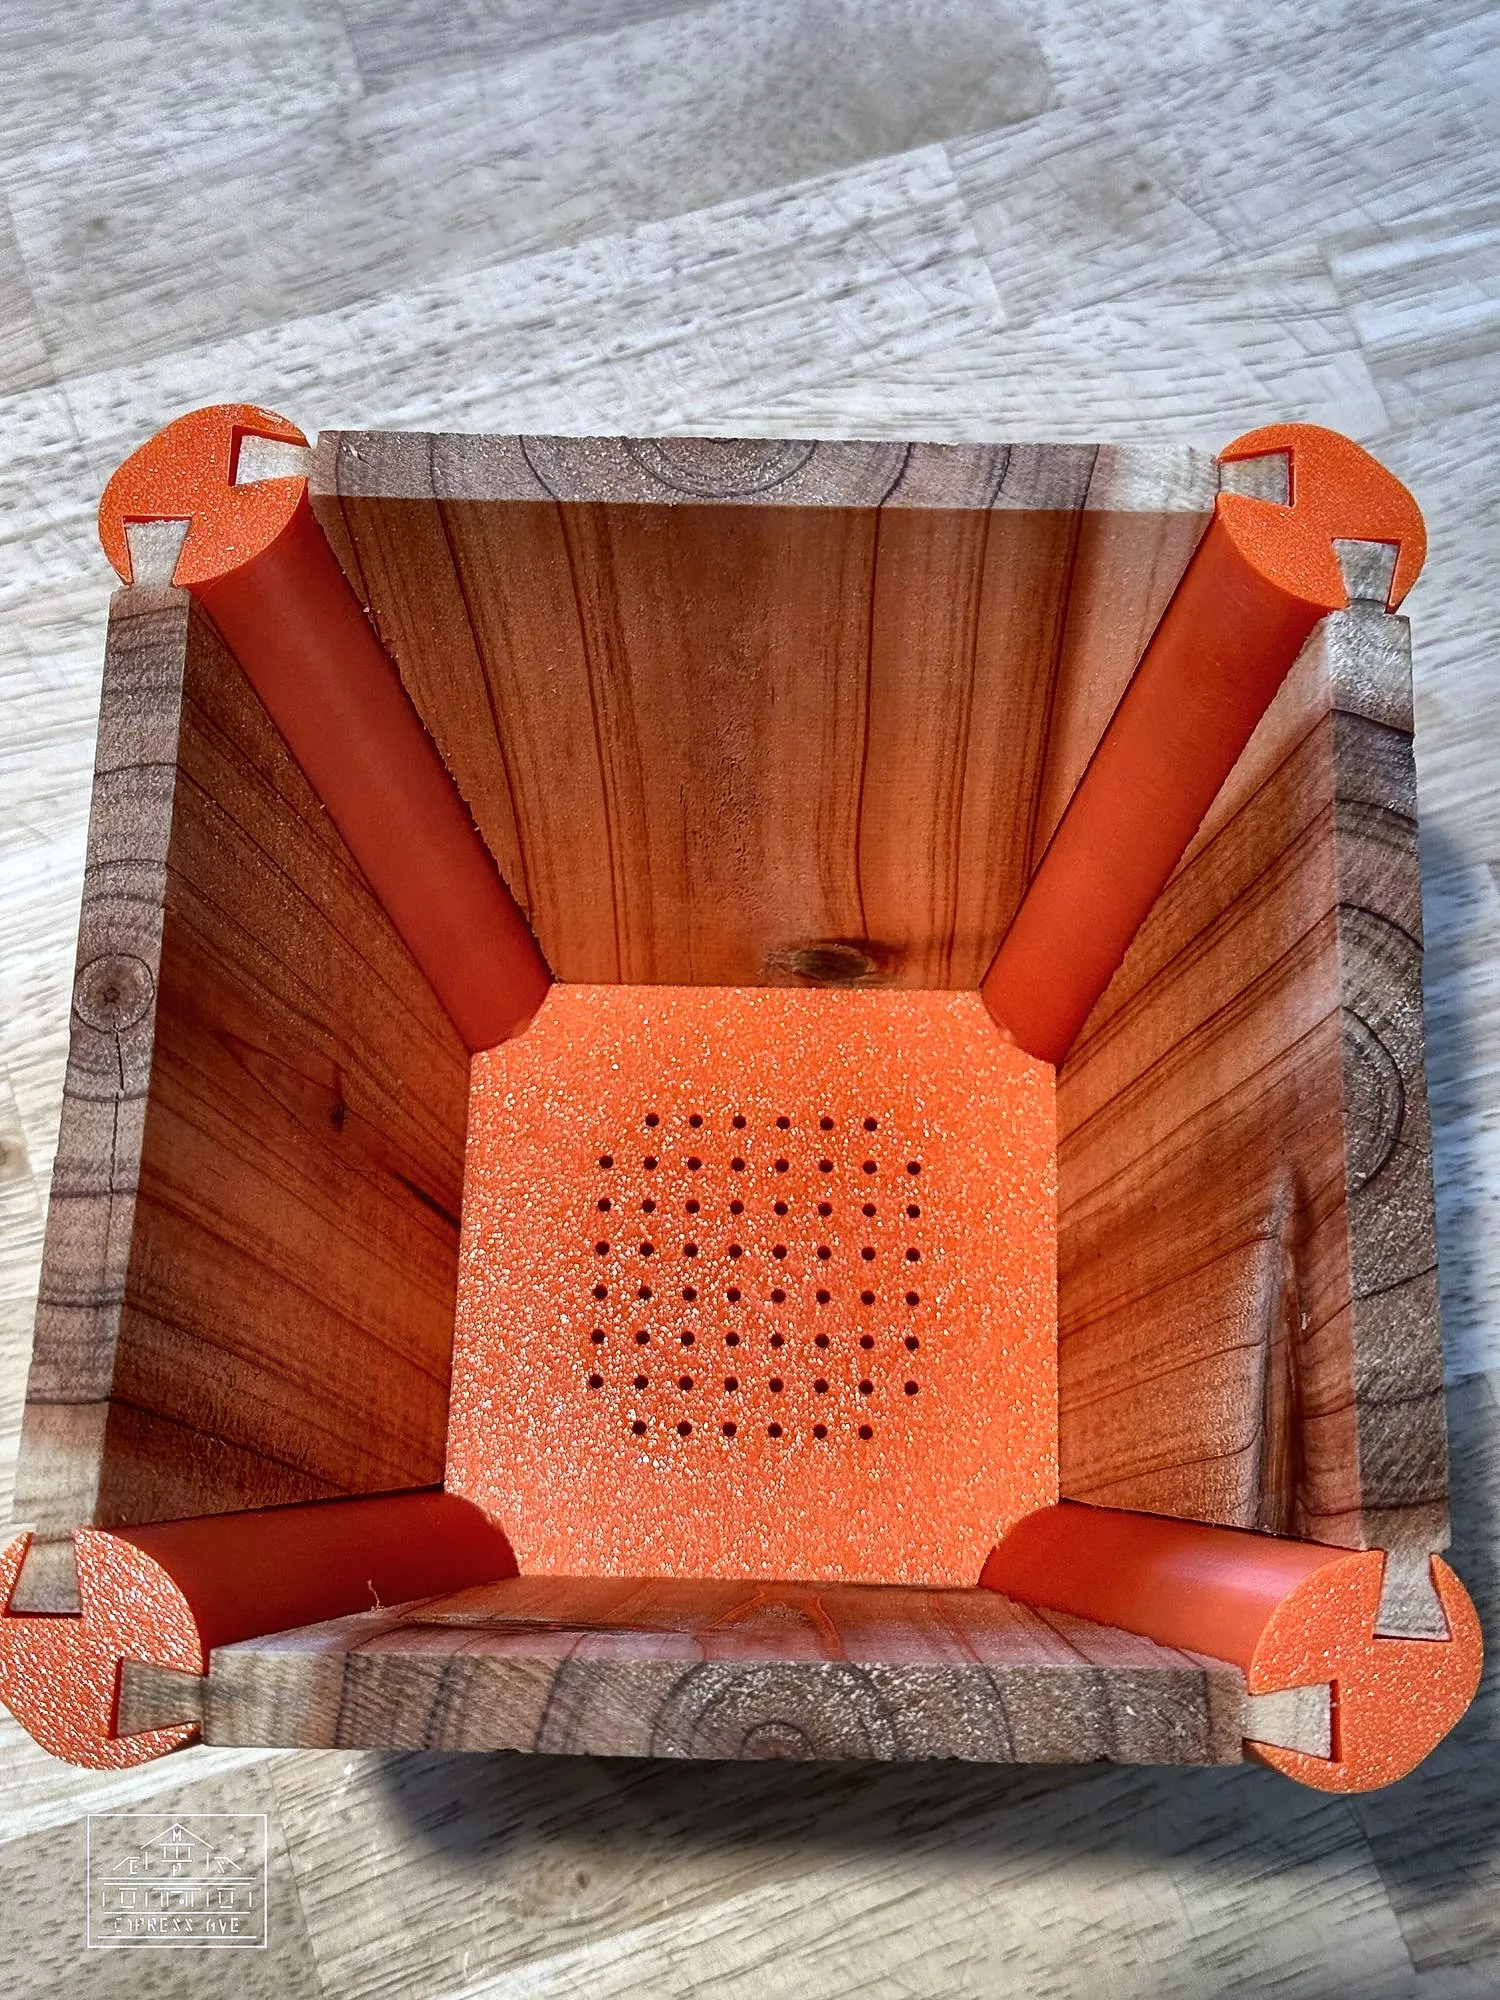
Done
Looking down you'll see the perforated plate sitting flat inside the four posts. Add soil and a plant — and send us a photo.
Building your own
Cedar panel dimensions
Every planter and kit comes with its cedar panels cut to size. Want to make a spare, or try a different wood? Each side panel is a tapered trapezoid — cut all four the same and they'll seat evenly; a small miter saw or a jig on a table saw works well.
| Top width | 135.5 mm (5 5/16") |
|---|---|
| Bottom width | 86.5 mm (3 13/32") |
| Height | 152 mm (6") |
| Thickness | 10.8 mm (about 7/16") |
| Side slope | ≈ 10° side taper |
Tolerances: ±1 mm on widths, ±0.2 mm on thickness. Too thick and the panel won't seat; a hair thin is fine.
Care & planting tips
Drainage
The plate has holes; the posts have feet. Set the planter on a saucer indoors, or straight on the patio outdoors — water runs out the bottom.
Cedar outdoors
Cedar silvers with sun and rain and that's fine. To keep the warm color, wipe on a food-safe oil once a year. Skip paint; it hides the engraving.
Taking it apart
Lift a corner post straight up and the panels slide free. Handy for moving, gifting, or swapping in a new color of corners.
Something not fitting? Send us a photo — we've seen it all and we'll help you sort it out.